How to create catchment areas within catchment areas
Most health campaigns we work with operate across more than one level of geography. A district has health facilities. Each facility has a service area. Within that service area, you need to know which supervisor covers which communities, or which community drug distributors are responsible for which households. Geographic hierarchy may go deeper than a single layer.
The Crosscut App lets you use an existing catchment map as the boundary for a new one, including catchments you build around geocoded points. We covered that concept and common use cases in our introduction to two-tiered catchments. This guide focuses on the steps.
Understanding geographic settings and options
When you create a catchment area map in the Crosscut App, one of the more important things you select is which administrative level to use as your boundary. Most countries have several levels preloaded for you to choose from.
Take Eswatini as an example. It has the country boundary (Admin 0), four regions (Admin 1), and 55 Inkhundlas (a local administrative subdivision and constituency in Eswatini), the smallest administrative unit available in this country (Admin 2).
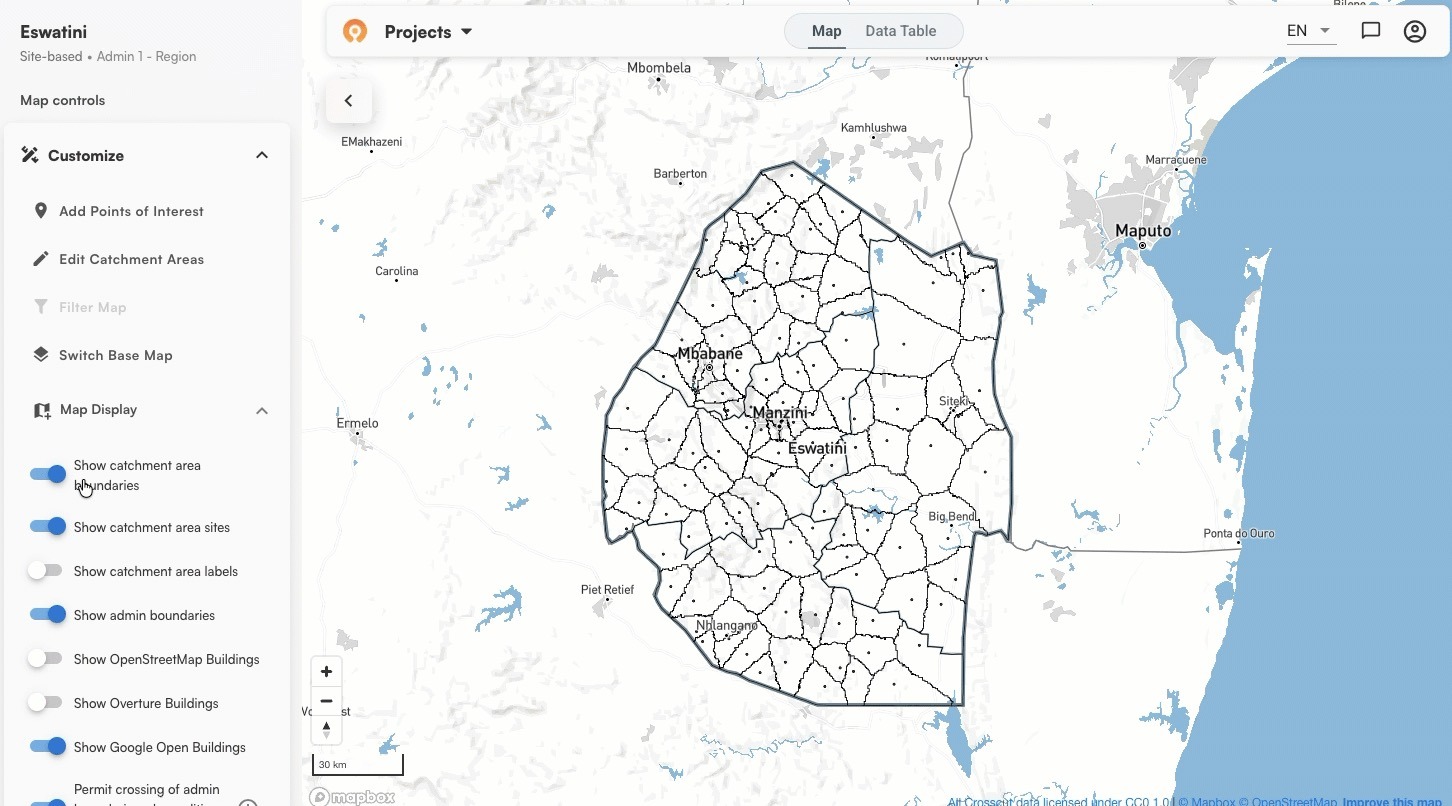
- The thick grey lines in the images below show the admin boundaries at each level.
- The black dots are known health facilities at the center point of the catchment area.
- The thinner black lines are the catchment boundaries themselves.
Toggling between the catchment boundaries shows you the geographic skeleton you're working on top of before you add your own data.
Admin 0 - Country

Admin 1 - Region
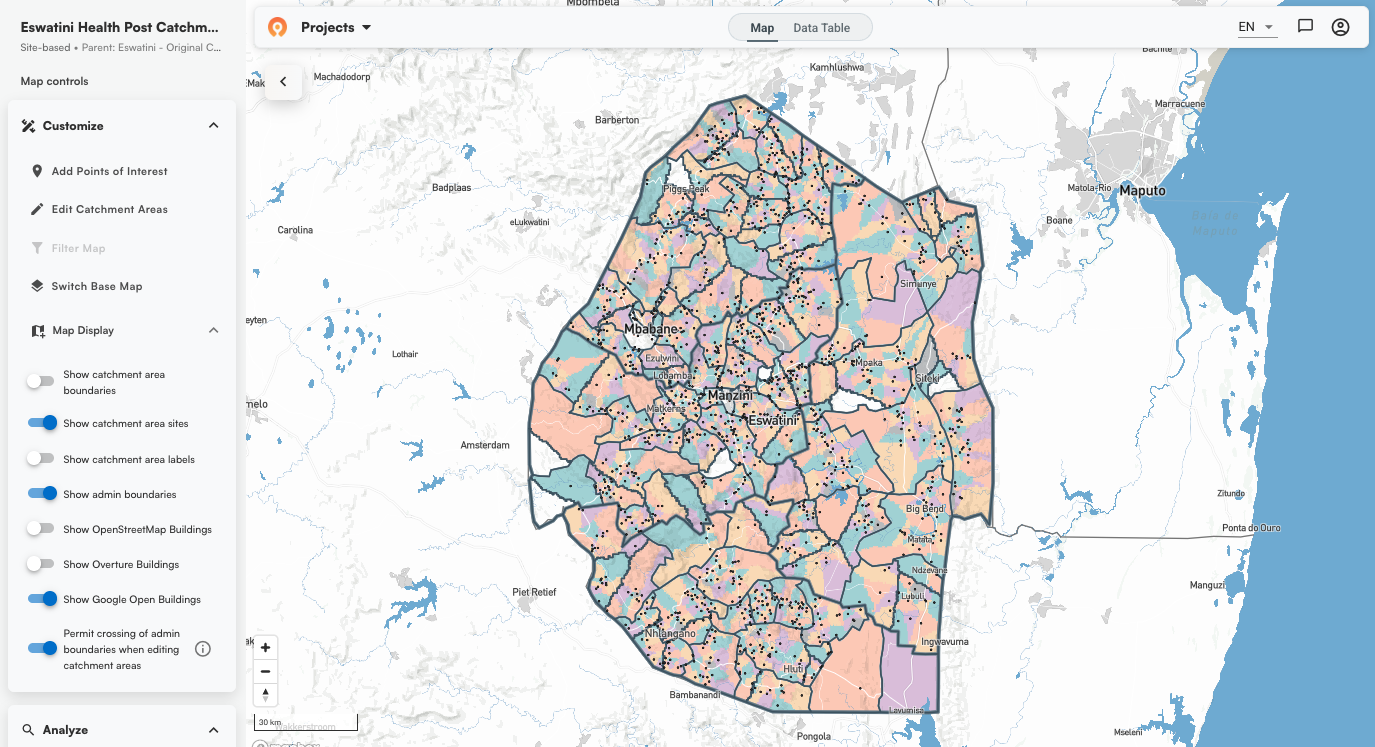
Admin 2 - Inkhundla

These boundaries don't require any setup on your part. They're pre-loaded in the Crosscut App, along with population data from sources like WorldPop, Grid3, and Meta, so you can start building immediately regardless of which admin level fits your program's structure.
The Custom option lets you take the maps one step further. Instead of using one of these standard admin levels as your boundary, you select a catchment job you've already run. This option gives you a second layer of territories that stays inside the first.
What you need to create two-tier catchments
The app pulls your previous projects in to choose from. For this guide, we're working with health facility data from Eswatini. We'll use a site-based catchment job we already ran at the facility level as the parent boundary, then create a second layer of catchment areas for health posts within those facility territories.
Guide: Create catchment areas within catchment areas
This process is the same whether you're building two layers across a single district or across an entire country. The scale does not change the steps.
For this example, we start with health facility catchments across Eswatini as our first tier. We then take those facility territories and break them down into smaller catchment areas built around monthly vaccination outreach session sites. These are fixed community locations where a vaccinator is available on a scheduled day to reach children in the area. The facility catchment tells you which health facility serves an area. The outreach catchment tells you which session site covers each community within it.
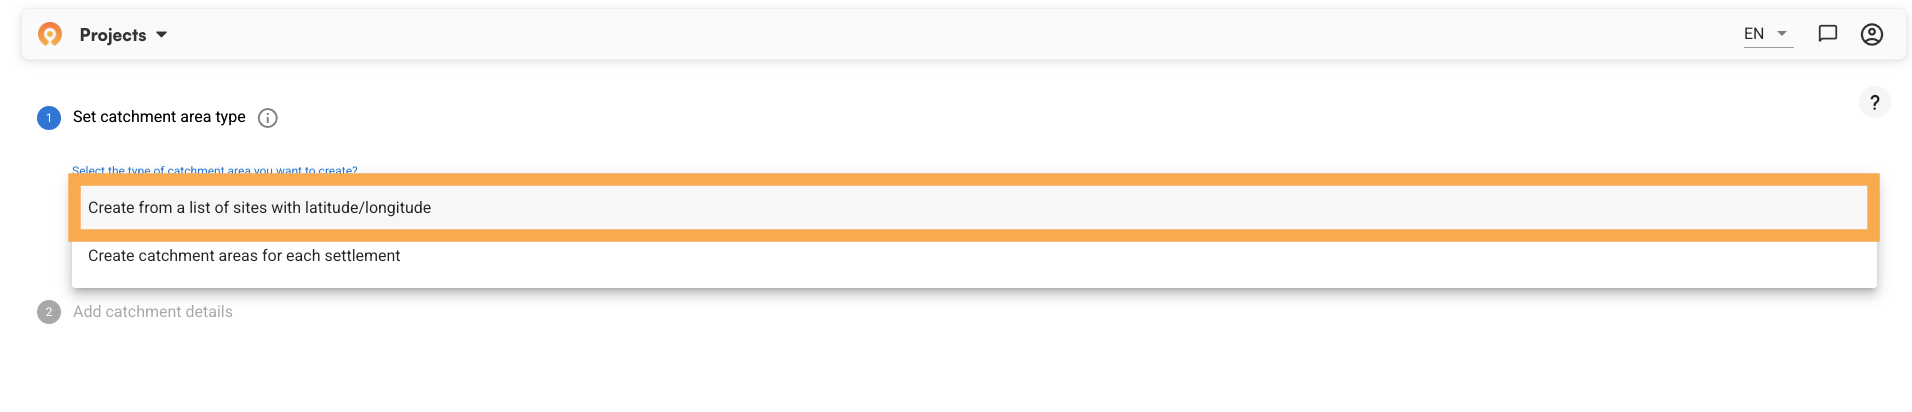
Step 1: Start a new project
Log into the Crosscut App and click + New. Set your catchment area type the same way you would for any new job. In this example we're using site-based mapping again for the second layer, but the steps are the same regardless of which catchment method you choose.
Below the catchment type, you will see: "Do you want to limit the maximum size of the catchment areas?"
Two options appear:
- No limit (all areas will be assigned to their nearest site) – Every piece of land gets assigned to the facility it can most easily reach. The full area is covered. This works well when you need to know who is responsible for every community, including remote ones.
- Limit (some areas may not be included in a catchment area) – You set a maximum threshold, and communities beyond it fall outside any catchment. This better reflects realistic service reach when the goal is coverage people can access.

We chose No Limit for this project. If you choose Limit, you set that threshold: walking travel time from the site (in hours) or straight-line distance (in kilometers). Walking travel time is more common for evaluating accessibility to services, since it accounts for factors like roads and bodies of water that impact how people really travel.

Step 2: Add catchment details
Choose your country and the area you're working in. Give this job a name that makes the relationship to your first layer clear. "Eswatini Health Post Catchments" works well here since the parent job is already named at the facility level, so the hierarchy is obvious when you return to your project list later.

Below the name field, you'll see the admin level dropdown. Scroll to Custom at the bottom of the list where a final field appears. Select the job you want as your parent boundary. In this example that's Eswatini - Admin 2 - Inkhundla. Click Next.

From this point forward, each of those first-tier catchment areas becomes a hard boundary for the new job. The second-tier territories will stay inside them.
Step 3: Configure, upload, and run
Now you upload your GPS coordinates for your locations. These can be health facilities, community drug distributor positions, supervision points, or any other sites you're building catchments around. After uploading the CSV file, you will need to identify which column holds the site’s name, latitude, longitude, as well as an optional column with structure counts.
The outreach session points in this example are the fixed community locations where vaccinators are scheduled to work. Each one becomes the center of a second-tier catchment built within the health facility territory it falls inside.
Step 4: Read your catchment area map
When the map loads, the structure becomes clear. The thick lines running across the country are the health facility catchment boundaries, your first tier. The colored fills within them are the individual outreach session catchments, with each color representing one outreach site's territory.
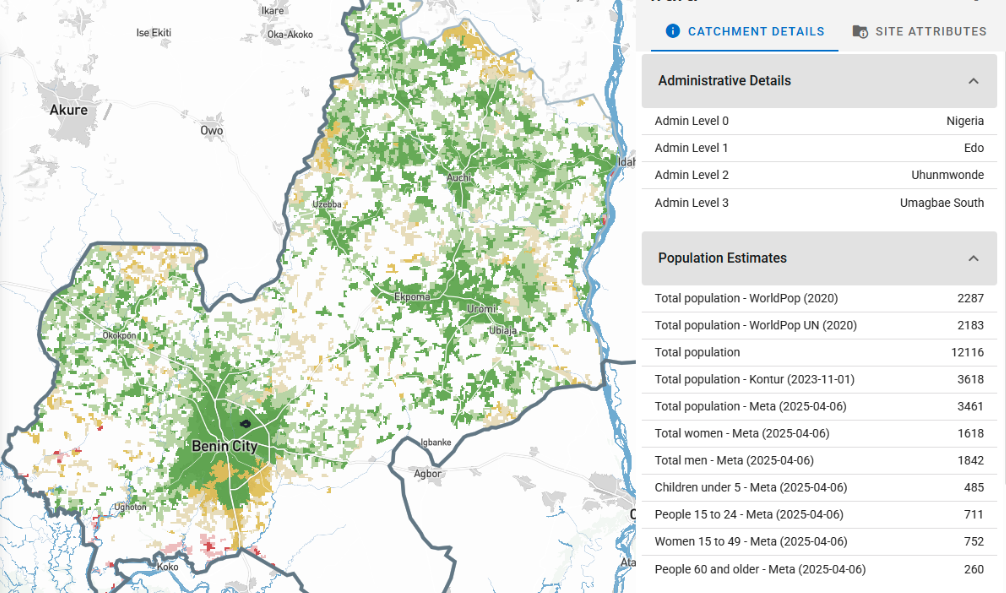
Each facility catchment now breaks down into the outreach areas it contains. Clicking on any colored area opens a details panel showing which facility catchment it belongs to, its administrative context, and population estimates from WorldPop, Kontur, and Meta.
Step 5: Visualize your data (optional)
Under Analyze, switch on the data layers to visualize either travel time accessibility or population across your catchments. For this example we're using travel time. Green areas are within roughly an hour of walking from the facility itself. Yellow areas sit between one and four hours out. You can also customize these settings for your project scope.
This gives you a quick read on which communities can realistically reach a session site and which are farther out. Seeing that alongside the facility boundaries above helps teams understand not just who is responsible for an area, but how well that area is actually being served.
Step 6: Edit where needed
Your new catchment boundaries are a starting point. Maybe a team member knows a road that floods in the rainy season, or a community that uses a different facility than geography suggests. You can edit catchment boundaries directly in the app without switching to a separate GIS tool. The process is easy enough that it can happen in real time during a planning session.
Create two-tier catchment maps in minutes
What you build in this guide is one configuration. The workflow is the same whether you're mapping supervisor zones inside health facility catchments, community territories inside supervisory areas, or any other nested structure your program requires. Build the first layer, select it as the parent, build the second layer inside it.
The algorithm at each level is up to you. The site-based, settlement-based, and fair supervisory areas approaches each solve a different problem, and the two tiers don't need to match. The combination depends on what data you have and what your program needs to see.
Two-tiered catchments are free in the Crosscut App. If you want to talk through the approach for your program, reach out to us.
Related Posts
An independent evaluation of the Crosscut App
.JPG)

How to set up a Microplan Collector project in the Crosscut App

May 2026 updates: Shared microplan projects and easier supervision analysis